Screenshot is basically known as taking a picture of your screen on whatever you are working on. It’s just like snapping a photograph of your display screen and save it as a picture on your computer. Just like any other device like smartphones, Mac or any other electronics device, Windows 10 also has the feature to take screenshot of your screen.
In this tutorial, we will show how to take a screenshot on Windows 10 which is viable for all users, from newbies to experts. We will reveal 3 ways to take screenshot on Windows 10 using the default screenshot button to using a third party software to make it more advanced. Feel free to use any method shared on this tutorial and hopefully, it will not cause any inconvenience since it’s a super easy job to accomplish.
Method #1: Take Screenshot with the default Print Screen button (prt scn)
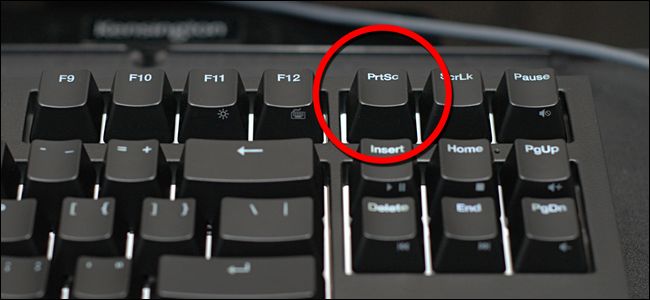
Print Screen button or the PRT SCN button is located on every keyboard that you are using as an input device on your computer. The job of this particular button is take a snapshot of your computer screen and save it as a file on your local hard drive. Let’s see how to use this button to click a snapshot of the display screen –
Step 1. First, open the window of which you want to take a screenshot of and simply tap the “prt scn” button once on your keyboard. Basically, it is located beside the F12 button.
Step 2. When you press that button, a screenshot is automatically taken. Now, tap “Windows + R” key together and type “mspaint” to open the paint app on your computer.
Step 3. After the paint app is opened, tap “CTRL + V” to paste the screenshot. Now, save the file on your computer as any file format you want like PNG or JPG etc.
Alternatively, you can tap Windows + Prtscn button together to directly take a screenshot and save it automatically on the default picture folder. Easy as that. If you feel, it’s a complicated method then move on to the next technique.
Method #2: Partly take a screenshot on Windows 10
If you only want to take a screenshot of a portion of the screen then you can use a default program pre-installed on every Windows 10 computer. The name of the app is Snipping Tool which is really very handy if you want to crop the image, edit it instantly and save it on your PC. Here’s how to do that –
Step 1. Click on start and open the snipping tool app.
Step 2. A new little toolbar will open, tap on the “New” button and now you are ready to take a screenshot of the display screen partially.

Step 3. Drag the mouse and select the portion that you want to take a picture of. After the selection is done, leave the mouse and the app will automatically take a picture of the selection.
Step 4. There are many editing features available if you are interested and when you are finished, you can click on the save icon and store it on your PC.
Done just like that. This was another easy way to take screenshot of the computer especially, if you are taking a picture of the particular area. Now, if you are a professional guide writer or online teacher then you may need to take assistance from a third-party software to take screenshots professionally.
Method #3: Take screenshot on Windows 10 computer with Third-Party Software
Like we mentioned, for taking screenshots professionally, you must use a third-party software and in this tutorial, we will be using Screenshot Captor program. It is a free and amazing screenshot taking tool that can not only take a screenshot on your PC but it gives you hundreds of additional features to edit them. You can perform annotating, editing, sharing and manipulate the picture however you want.
Step 1. Go to donationcoder.com and download the Screenshot Captor software on your PC. Install the program and launch it to see its main graphical user interface.
Step 2. Choose the option “Current Screen” and click on “Capture” to take the screenshot of the current screen.

Step 3. Once the screenshot is taken, you can edit the picture, apply effects and manipulate it as much as you want. Once you are satisfied with the picture, you may save it on your PC and you will have a customized screenshot of your choice.
Use the program as much as you want to become an expert on it since there are too many features to list to be honest.
In conclusion, taking screenshot on Windows 10 computer is an easy task if you have followed the guidelines shared in this tutorial. If you have found this guide helpful then do care to share this article with your friends and families in social media as much as you can. If you want us to write tutorials on other queries then don’t forget to share your issues with us in the comments below.