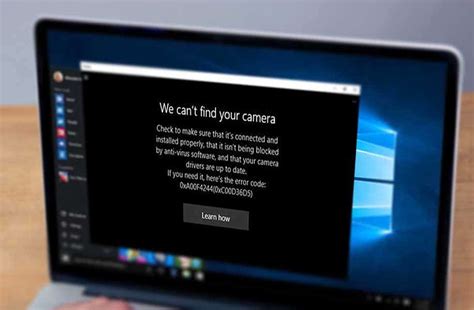
A camera is an imperative device and holds a firm place, when you are using a computer or a laptop. You need to basically for video calls, online chatting etc. And if you are one of those guys who prefer to work on online conferences, then even a little issue with your camera can cause a real sense blunder. Now built-in cameras and third party cameras misbehave occasionally. One of the most common issues that surfaces nowadays is the camera error code: 0xa00f4244 which comes with the following prompt on screen
“We can’t find your camera”.
Fortunately, there are solutions available to this particular issue, but not all of them seem to work effectively. The ones which work with certainty are explained below to help you fix Camera error.
Method #1: Fix Camera Error Code by Scanning for Malwares
Although the omen of being stalked by cyber criminals are always a dreading possibility, now spywares and malwares manipulating your web cameras to expose your details to a hacker can be a much more blunder coming your way. Thus scanning the malware possibility should be the first leap of attempt we must approach to fix camera error.
Step 1. Open firstly the “Windows Defender”. You can go to it from the notification area also if you can.
Step 2. Move the cursor to select “Virus & threat Protection” button.
Step 3. Proceed with the process by selecting “Scan Offline” option thereafter.
Step 4. Soon your PC will be restarted and the scanning process will be commenced.
Step 5. After the system turns on again, follow the same procedure to open up the “Windows Defender”.
Step 6. Next; click on “Virus & threat Protection” option once more to continue.
Step 6. Next activate the "Cloud-based protection” feature from the “Virus & threat protection settings” option.
Step 7. Make a quick restart again to apply the changes you have just set recently.
Method #2: Fix Camera Error Code by Tweaking Registry
If you have been dealing with computers or laptops for a considerable amount of time, then you must know the efficacy of registry editor and this is what we are going to use in this method to fix camera errors.
Step 1. In the “Run” search box, input “regedit” and hit “Enter” to open the Registry Editor operating page.
Step 2. Next; click on “File” and select “Export” to keep a backup of your registry for a safer side.
Step 3. So now if you posses a 64-bit OS then follow the pathway HKEY_LOCAL_MACHINE > SOFTWARE >WOW6432Node>Microsoft > Windows media foundation > Platform and if it’s 32-bit then follow the pathway HKEY_LOCAL_MACHINE > SOFTWARE > Microsoft > Windows media foundation > Platform
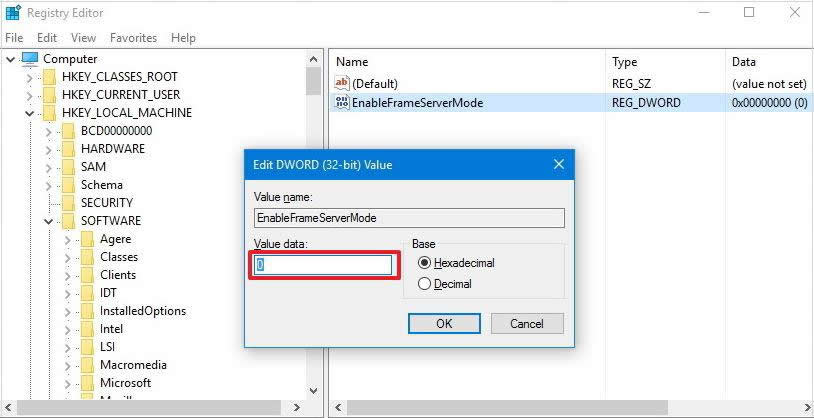
Step 4. Choose “DWORD(32) value” from the “New” option on the right hand pane.
Step 5. Alter the name of the newly created entry with “EnableFrameServerMode” name.
Step 6. Right click on this sub-key and select “Modify” from the context menu to change its value data to 0, which resembles the deactivation binary digit.
Step 8. Finally reboot your computer and it’s all set to go fine.
Method #3: Run the Store Apps Troubleshooter
Undoubtedly the built-in cameras are fully capable enough to do the job, but at times they start to misbehave. Don’t get us wrong, but that is what happens with every other Windows store apps. Now luckily we are available with a newly launched troubleshooting menu which might help you fix camera issues 0xa00f4244.
Step 1. So first of all initiate the Camera app, and press “Win + I” to open the “Settings” app.
Step 2. Select “Update & Security” option from the list.
Step 3. From the left hand side panel, choose “Troubleshoot”.
Step 4. Move down the list and click on “Windows store apps”.
Step 5. Eventually click on “Run the troubleshooter” option.
So basically what it does is that if there is any app related issue, it will be sorted out with this method, and the camera will start to work normally again.
Method 4: Update Camera Drivers
All computer requires to install the camera driver properly before you could take full advantage of it. So, if the issue is camera driver related then updating or re-installing it would definitely resolve this issue. Follow these steps to ensure you have the updated version of the camera driver –
1. Click on Start and open the Device Manager.
2. Find the Imaging Device option and click the toggle button to expland. Then right-click on the name of your camera, and then select Properties.

Note: In Windows 10, some cameras/webcams may show up under “Sound, video and game controllers”. So if you don’t find your camera under Imaging devices section, then find it under “Sound, video and game controllers”. If you don’t even see your camera shows up in Device Manager, for external camera, try to plug it to another USB port.
3. Next, click on ‘Driver’ tab located right beside the General tab and click Driver Details button.
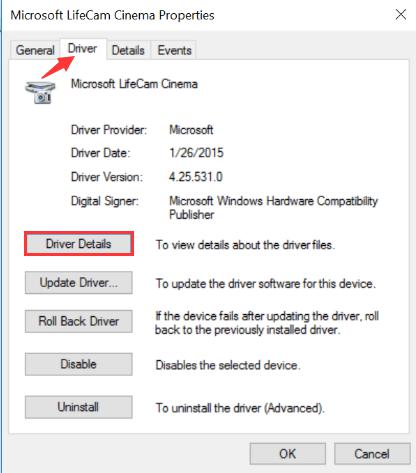
4. In Driver File Details dialog box, look for a file named “stream.sys”. If you find the file there, your camera was designed before Windows 7. In this case, you are required to replace it with a newer camera.
Method 5. Camera Hardware Turn ON
Here you will be able to see that the Camera Hardware option is turned ON. If you can’t find the option then in the search bar, type “Privacy” and you will find it. Once the Privacy window is opened, just click on Camera Options and toggle the button ON.
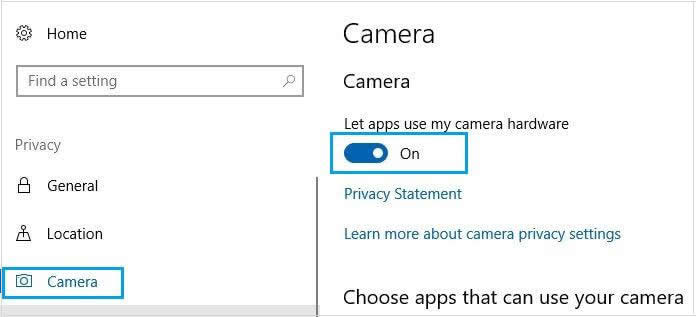
Your camera should work flawlessly now but if it still fails then there must be a problem on the camera bean and in that case follow the next solution.
Conclusion:
Even if you are not using your webcam on an incessant rate, you should not neglect the matter. Malwares and spywares can unknowingly let your webcam do the mischief and by the time you realize that you are under the vigilance of someone all along the way, it will be too late to atone the mistake. So be alert about your webcam issue, and try to rectify it as soon as possible. Take expert advice if need be.