TunesBroDiskGeeker
How to Use TunesBro DiskGeeker for Data Recovery
Tunesbro DiskGeeker is a perfect tool for recovering lost or deleted files from hard drive, SSD, USB drive, camera and other storage device. No matter what kind of reasons caused the data loss, you can use this program to get them back. If it was the first time you came across this program, then this tutorial will help you go through the steps on how to use this program for data recovery
Step 1Download and Install Tunesbro DiskGeeker
The first step is to download the installation file onto a computer. You can download .exe file directly from here or product page. Then follow the instructions in setup wizard to install the program. Finally, launch the program at the end of installation.
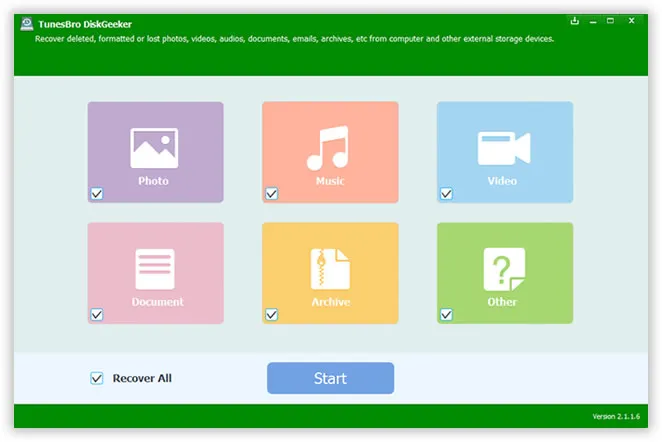
Step 2Select File Type and Drive Name
In this step, you need to select the file types according to your own needs. The options are Photo, Music, Video, Document, Archive or Other. Or you can select "Recover All". However, the more you selected, the more time will spend on scanning process. After file selection, click "Start" button and select a drive for scan. Finally, click "Start Scan" button located at the bottom to start the file scanning process.
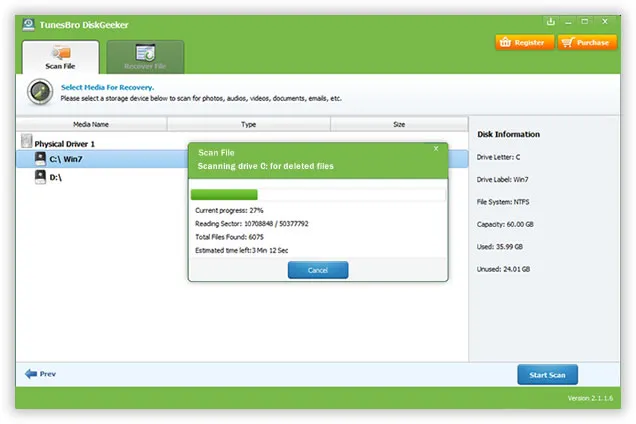
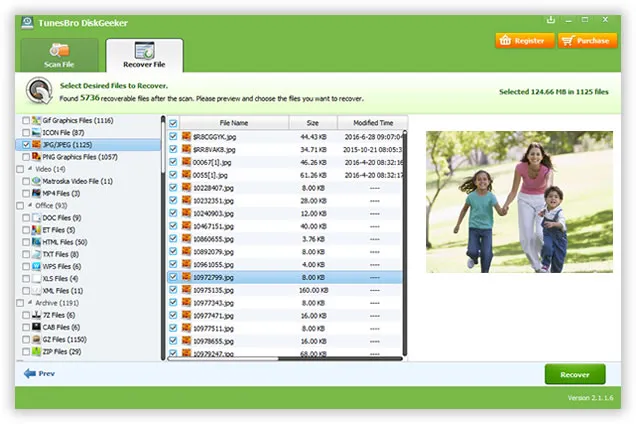
Step 3 Preview and Recover Selected Files
The scanning process will take some time, which is largely dependent on how many files stored on that device. After scanning, files are grouped into different categories. You can preview each file and mark them selected if it was the file you wanted to recover. When you have done the selection, click "Recover" button to save recovered files to your computer.
If you followed all the steps in above tutorial and still have problem, please send the details to support@tunesbro.com. We will try out best to assistant you recovering the lost data.