TunesBroScreenGeeker
How to Easily Record Screen on Windows PC with TunesBro ScreenGeeker
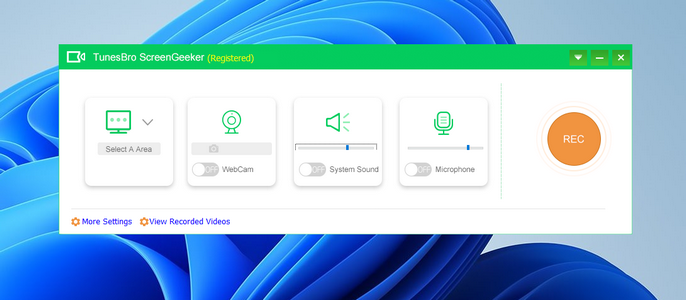
TunesBro ScreenGeeker is acclaimed as one of the best free screen recording software options for Windows. It offers a robust set of features that cater to professionals and casual users alike. With TunesBro ScreenGeeker, you can record screen activities along with system sounds and external microphone audio, take screenshots, create HD webcam videos, and more. It supports a wide array of recording settings to craft the perfect video for your needs.
Compatible with Windows versions from XP through Windows 11, ScreenGeeker stands out by offering an intuitive interface, flexibility in recording screen sizes, the ability to capture both video and audio, and shortcuts for enhanced productivity. To record your screen on Windows using TunesBro ScreenGeeker, follow these detailed steps:

Step 1Download and Install TunesBro ScreenGeeker
Firstly, download TunesBro ScreenGeeker from above link and run the installer with administrator privileges. Ensure your internet connection is active during installation.
Step 2Set a Screen Area for Recording
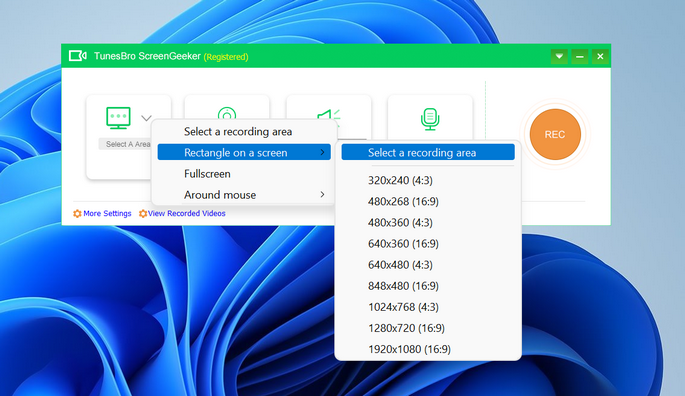
Choose whether to record a specific area or the full screen by selecting "Select A Area" and then "Select a recording area" from the dropdown menu. You can drag over an area or opt for full-screen capture. Additionally, you can toggle the system sound and microphone on or off according to your needs.
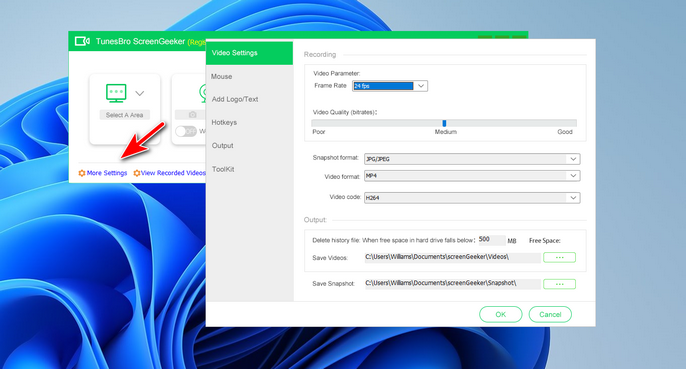
Step 3 Set Capture Parameters (Optional)
Before starting your recording, adjust the video parameters to your liking. This includes setting the mouse color, cursor effects, keyboard actions, hotkeys, adding logos or text to videos, selecting video and snapshot formats, and more. This step ensures your recording meets your specific requirements.
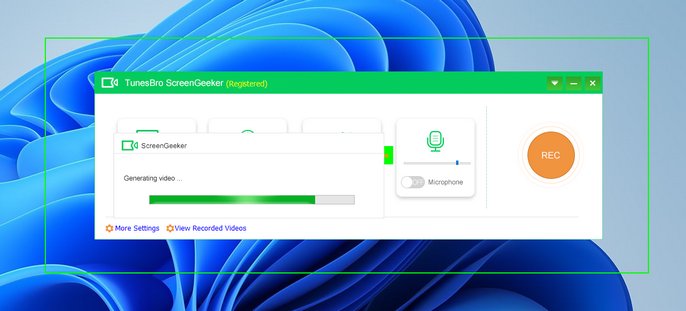
Step 4 Start to Record the Screen on Windows Computer
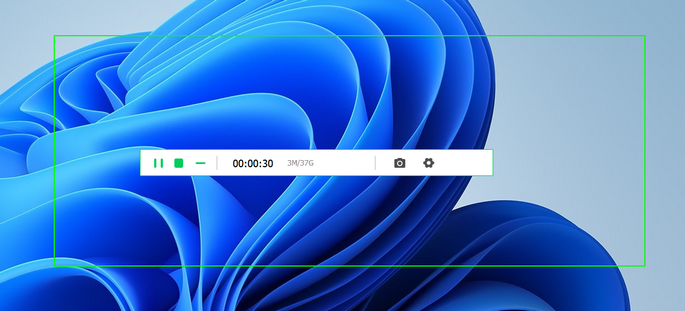
When ready, click the "REC" button to start recording. The area sounded by yellow rectangle is the place you are recording the screen. You can see the time frame and file size from the status bar.
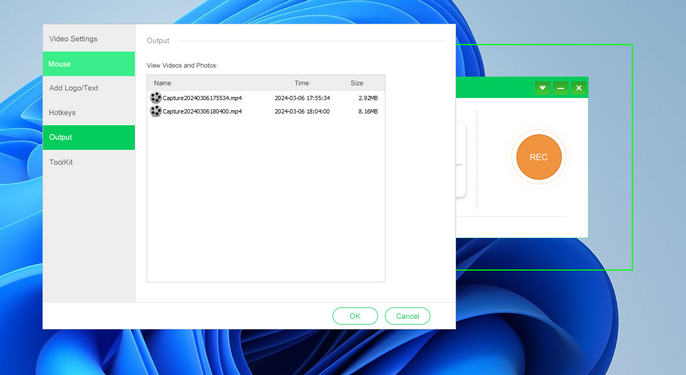
Step 5 Save and Play the Video
Once your recording is complete, click the "Stop" button on the toolbar to end the session. You will then be prompted to save your video.
After saving, the software will display a list of all recorded videos and captured images, which you can click to play back and review your recordings.
ScreenGeeker offers an impressive array of features for a free tool, including the ability to record without time limits or watermarks, the choice of various recording modes, and high-quality output options. It ensures system stability for long recordings, allows the addition of webcam overlays, and includes a unique "Around Mouse" recording mode. These features make ScreenGeeker an excellent choice for anyone looking to record their screen on Windows for any purpose, be it business presentations, capturing web meetings, or creating personal video content..