How can I find duplicate files on my Mac? Duplicate files, especially those with large size, can eat up a lot of storage on a Mac computer. The problem with duplicates is that you don't know when you downloaded multiple copies and over what time frame. That makes them harder to find the duplicates. You can delete them manually, of course, but that would be a labor-intensive task. You can also find and delete them using command line executions on Terminal. Finally, you can search for a good utility that will take care of the problem for you, not just once but on a regular basis.
Before we describe the three methods, keep in mind that finding duplicate files is a tricky thing because of different file names, different versions of the same file, different download times and so many more variables. The first method shown below will make your manual search a little easier and a little more fruitful.
How to Automatically Find and Delete Duplicates on Mac with CleanGeeker App
A lot of people prefer using third-party apps to clean up the Mac disk becasue of it takes less time and effort. TunesBro CleanGeeker is one of the best mac cleaning apps you can put trust on. It is the right app you've been looking for ever since your computer slowed down and started acting like a senior citizen. Using complex algorithms, this software will identify duplicates, junk files, residual files left by apps and a whole lot more. In addition, it can securely shred digital files and even extract RAR files.
When it comes to duplicate files, CleanGeeker is second to none. It clearly labels your duplicates so you can spot and keep the original while automatically removing everything else with just one click. It even categorizes them so you can visually see where duplicates are getting piled up.
Highlights of TunesBro CleanGeeker
- Fastly find all duplicates on Mac drive .
- Clean up all the junk and caches files.
- Bulk remove third-party apps from Mac.
- Disable auto-start apps during login.
Step 1Install TunesBro CleanGeeker on Mac
Download the application and install it on your Mac computer. It supports all versions of Mac OS X right up to macOS Mojave (10.14).
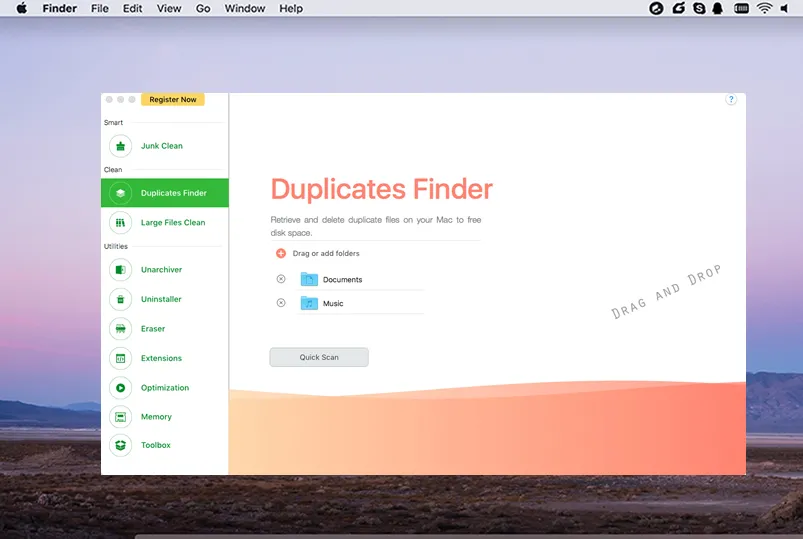
Step 2Scan Duplicates on Mac
Run the program and go to the 'Duplicate Clean' tab on the left side. In the middle you'll see the full list of files for which duplicates were found, and on the right you'll see the original along with the duplicates. The originals will be unchecked, while the duplicates will be checked by default.
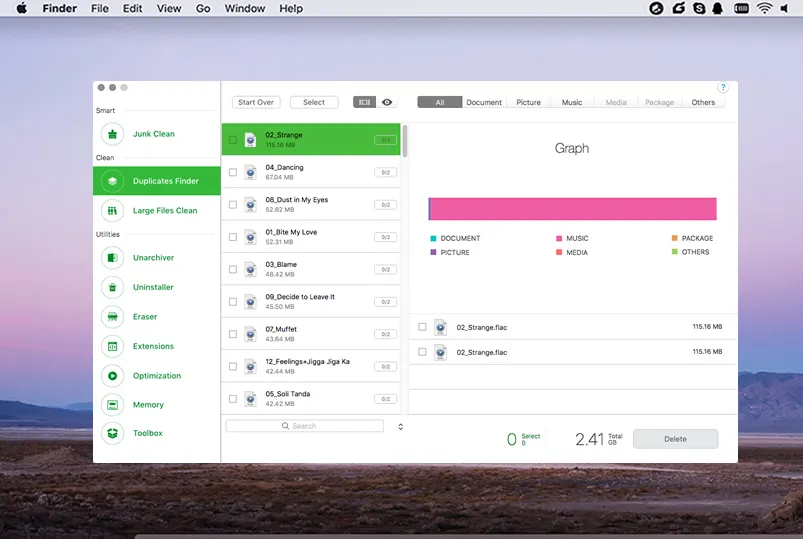
Step 3Choose Duplicate Files and Delete Them from Mac
Select or deselect the files you want to delete or keep, respectively, and then click on 'Delete' on the bottom right. Then all selected items will be completed removed from the computer.
Summary
According to the methods suggested about, CleanGeeker finds every single duplicate in your hard drive so you don't have to do anything folder by folder. You'll be spending a few minutes at the most for this entire process, and you can do it periodically to make sure duplicate files never clog up your memory ever again. You'll be hard-pressed to find another software application that removes unnecessary files so effectively.