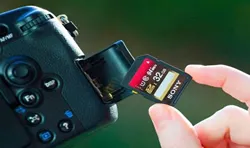
Micro SD card is a great way to extend the memory for digital devices like smartphone, camera, even for computers. When the storage of SD card is full or burning system image to the card, formatting the card is always a good choice. This is common among different users. It offers different benefits but also has some problems associated with them. For example, you may lose the photographs that were stored in the card, which you forgot to back them up before formatting. These photographs may be of paramount importance to you. They may include sweet little memories with your friends, exotic pictures of your trip or even attractive photos of flowers blooming in your garden.
The great news is that you can now recover those formatted or lost photos from the SD card with the help of TunesBro DiskGeeker. It is a versatile data recovery tool that can retrieve all kinds of files from formatted SD card including images, videos, documents or archives within minutes. So, even if you deleted some files by mistake or trash them from recycle bin, there are options to restore them. TunesBro DiskGeeker has provisions for data recovery from various devices such as mobile phones, cameras, hard drives and more.
It is a fast and reliable software with 95% success rate for guarantee. Over here, we will explain how to recover the lost photos from your formatted micro SD cards using this program. This can be done in some easy and simple steps.
User Guide : How to Recover Lost Photos/Files from Formatted Micro SD Card
Step 1Download and Install TunesBro DiskGeeker on PC/Mac
First of all, you need to install the software on your computer. So download the software first and then open the setup file to install it in the appropriate folder on a computer. Close the program when installation is completed.
Step 2 Insert Micro SD Card to the Computer
Now take out the SD card from the device and insert it to the card reader of the computer. Then the card should be scanned by the computer and remember the device name in Windows Explorer.
If sd card can't be detected by computer, please check whether it was inserted in proper port. If it was dirty, then clean it up first.
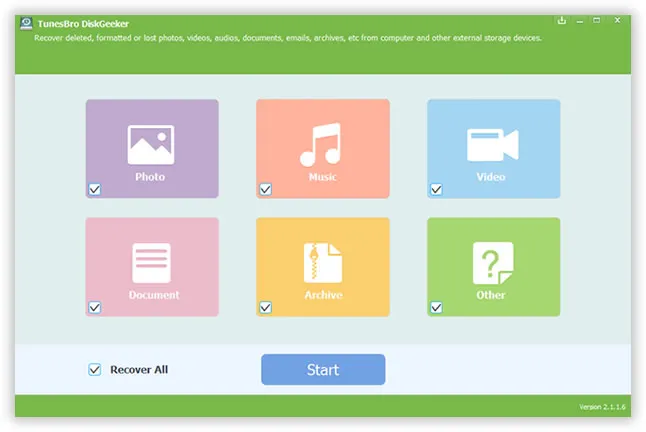
Step 3Run TunesBro DiskGeeker and Select File Type for Recovery
Now open TunesBro DiskGeeker from desktop shortcut. Once the program was launched, you have to select the file types for scanning. It will recover all kinds of files in default. However, in this case, we only need to recover photos. So we should uncheck other options from the startup screen.
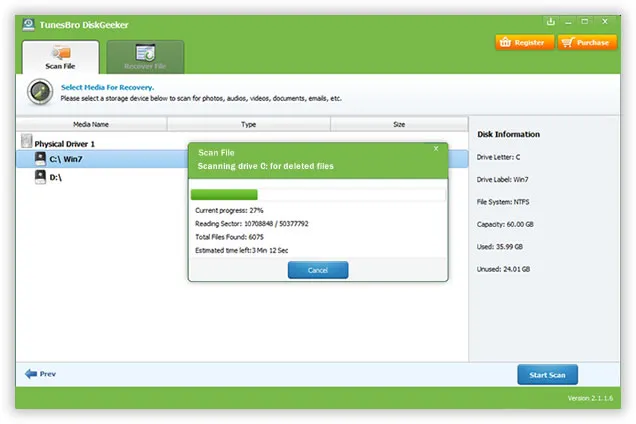
Click "Start" button to enter into the next window. In here, you need select the drive name of SD card. After selection, then click "Scan" button to start the file scanning process. This will take a while, please be waited.
Step 4Scan Lost Photos on SD card and Recover them to Computer
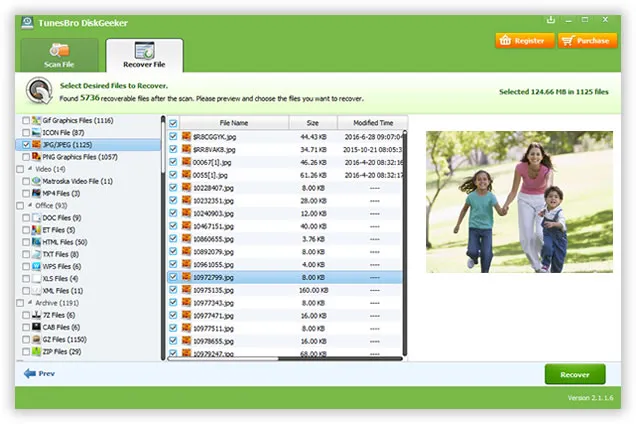
Once the scanning gets over, you will find a list of all the recoverable images in the left panel from where you can choose any image that you wish to recover. In the right panel the properties of each of these items will be displayed. You are free to preview any photo from the list.
Once you have selected your desired images, it is the time to recover them by pressing " Recover" button, which you will find at the bottom right corner of the screen. The recovery process will begin and the images will be saved to a local folder of the computer.
Once you followed the steps in above tutorial, I dare to say the chance is very high to recover those deleted or lost photos from any SD card, included but not limited to SanDisk, Kingston, Samsung, Toshiba, PNY, Transcend, Lexar. We have tested the program on various SD cards and the test result is very positive. It can even recover deleted files from Android phones, which is a great benefit for Android users once you use TunesBro DiskGeeker for data recovery.
Now, select the data type you wish to recover and click Next button. The program starts scanning and analyzing the whole file system on the phone to try its best locating the deleted files on that SD card. After scanning, all searched files will be presented in different categories and you can preview each file before recovery. At the end, click Recover button to save selected files to computer.
Related Articles & Tips
-
Recover Data from Dead or Broken Hard Drive
![[Solved] Recover Data from Mac](images/data_recovery/mac-recovery-2.webp)