Most of us love to take photos of beautiful places that we visit or to capture memorable moments of our life. A camera is something that we never miss out while packing our bags for a trip. It is also a must for celebrating different occasions such as birthdays or anniversaries. It often happens that we lost the photos that we stored on camera memory card. The reason varies from person to personal such as accidental deletion, malfunction SD card, physical damage or formatted by other software.
It would be not a terrible thing if you already backed up the photos somewhere else. Or it will be a great loss for you, especially those photos were taken for important moments or for clients. You have to get them back as many as possible. In fact, there are a few data recovery software that is able to fully recover the deleted photos from all kinds of cameras.
In this tutorial, I will use TunesBro DiskGeeker for an example. It is a award-winning program that won a lot of prizes and positive feedback from its users, which are fortunate enough to get back their precious photos. With the help of this powerful photo recovery software, it will be easy for you to get those pictures back. Recovering these photos is like a cakewalk once you know the proper steps in a sequential manner. It is equally efficient in recovering deleted or lost images and other files from your camera or phone. The user friendly interface makes the task quite simple for everyone and ensures a complete and speedy recovery of the items.
Supported Camera Brands: Cannon, Nikon, Panasonic, Olympus, Sony, Fuji, Pentax, Casio, Kodak, Leica, etc…
User Guide : How to Recover Deleted from Camera Memory Card on Mac or PC
Step 1Download and Install TunesBro DiskGeeker on a PC or Mac
First of all, install TunesBro DiskGeeker Software. It works seamlessly on Windows PC and Mac computer. Then you will have to store the setup in a convenient location within your system where there is enough space to accommodate the file. After the software is successfully installed, it is the time to run the same.
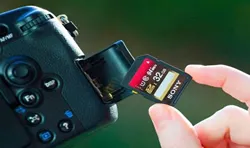
Step 2Connect Camera Memory Card to Computer
Now it is the time to establish a connection between the memory card of your camera and your computer. This can be done in two ways. Either place the memory card inside the computer or connect it via a USB card reader. The software will automatically read the camera memory card drive.
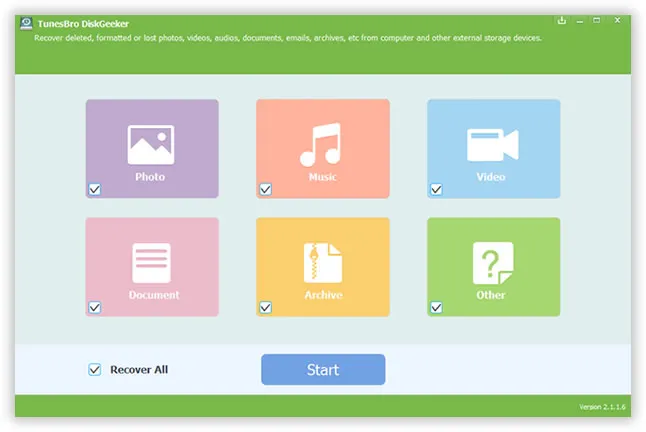
Step 3Select File Type and Camera Card Drive Name
From the main screen, there are six options listed, which you can choose according. Kindly select the file types you wish to cover and click Start button. Then choose drive name of the memory card and then click on " Start Scan" button to initiate data recovery process.
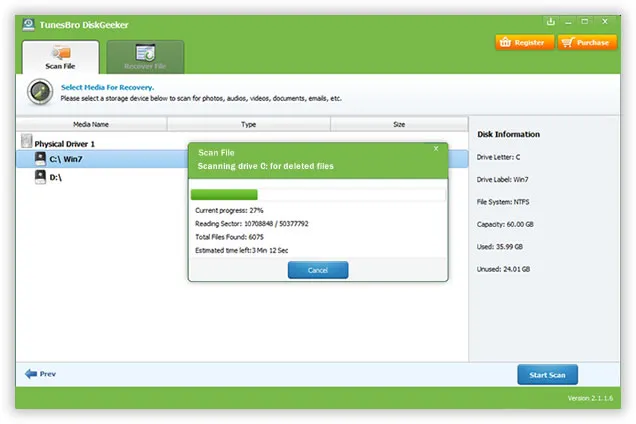
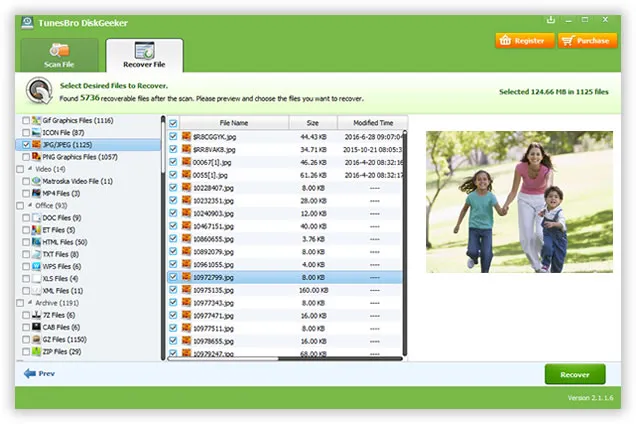
Step 4 Scan Memory Card and Recover Selected Photos
After the scanning gets over, you will get an option of choosing the files that you want to be recovered within your system. Choose the ones that you want to be restored from there. Finally click the "Recover" button at the bottom right of the screen. Watch the photos being recovered within your system slowly.
These simple steps will allow you to restore deleted photos from your camera memory card quite easily. So take more images without worries. Format your camera at ease. Use the software if you deleted photos by mistake to ensure a speedy restoration of them. All the best!
It is a safe and effective option for recovering files from broken hard drive, SD card, USB drive, SSD, camera and phones. You can also use it to recover items from storage devices like MP3/MP4 players and iPod. While recovering photos that have been deleted or formatted using TunesBro DiskGeeker, you need to follow the steps that are explained above.
Related Articles & Tips
-
Recover Data from Dead or Broken Hard Drive
![[Solved] Recover Data from Mac](images/data_recovery/mac-recovery-2.webp)