When we get to find out that we just deleted an important file from our Macbook either by mistake or intentionally, we all have come across that dropping feeling. It seems like we've lost it forever, but there are different ways to recover that file. If Trash can is full, be sure to look it there first. If you have Time Machine backup, you may retrieve the file back from there. If nothing else is working, you may do it with a third-party recovery tool which can scan your hard drive to find out the deleted file.
- Method 1: How to Retrieve Deleted Files from Macbook by Scanning Trash Folder
- Method 2: How to Restore Lost Data from Macbook from Time Machine Backup
- Method 3: How Recover Lost Files from Macbook by Using Data Recovery Software
Part 1: How to Retrieve Deleted Files from Macbook by Scanning Trash Folder
The deleted files will first go to Trash bin first. They are still on your computer. Please follow the steps in below to recover the files from Trash folder on Mac
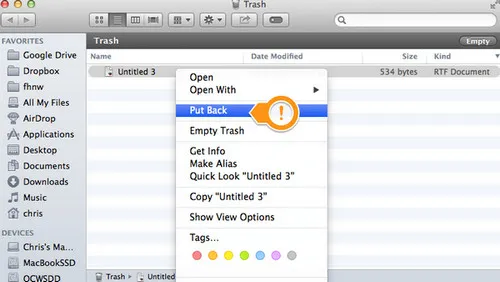
1. Open Trash Can: Items which you have deleted are sometimes transferred to the Trash. It can hold up your items until you delete them permanently. You can easily open Trash Can from the icon on the desktop.
2. Look for the Item to Restore: You can find the files you have deleted by scrolling through the Trash Can. If you couldn't find the files, you may want to go to further steps.
3. If Found, Right Click and click 'Put Back': If you couldn't find this option, it means the original location is no longer available. You will want to drag the file off the Trash and put it on the desktop. Then, you can move the file to any location.
Part 2: How to Restore Lost Data from Macbook from Time Machine Backup
TimeMachine is the official way to backup data on hard drive for all Mac computers. If you fortunately backed up the drive, then you can restore the deleted files from Time Machine. However, new date before the backup day will be deleted during the restore. Please keep in mind about that.
1. Go to the Location where Desired Item is Located: If you have backup from the Time Machine function, you can restore the older version of deleted file. Open the window with the file. For example, open "Documents" folder if something is deleted from that folder.
2. Now Plug-in Time Machine Drive – If Time Machine backups are available on network or external drive, keep the drive connected before you proceed.
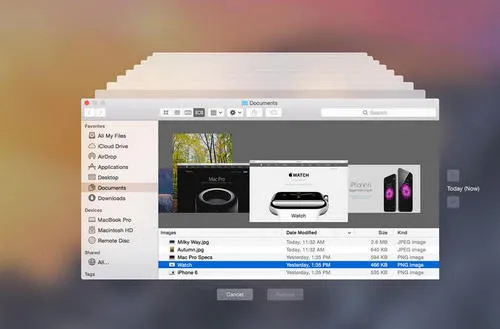
3. Click on "Time Machine" Menu – You can find this menu on the menu bar. Now choose "Enter Time Machine". It may take a while to access the Time Machine drive.
3. Find Backup – Use back and forth arrows to move between snapshots of the folder or use timeline on the right of screen and go straight to the specified location. If entry to the timeline is not active, the backup disk having the snapshot is not plugged in. instead, you can find specific file through the search bar.
4. Preview File – Double click the file and open it to see what version is added in the snapshot. Use preview to find the file version which is nearest to the one you like.
5. Restore – After getting the file you need, choose it and "Restore". It will restore the item to the original location. Then, you can choose several items to restore at once. If item was located in several folders, you may recreate the folders to restore the file.
Part 3: How Recover Lost Files from Macbook by Using Data Recovery Software
TunesBro DiskGeeker for Mac is a great tool to recover deleted or lost files from SSD, hard drive, USB, camera and various storage devices. No matter what are the reasons of data loss, you may use this program to restore it. You can use this program to recover photos, videos, Word, Excel, PowerPoint, as well as other type of data. Follow these steps to recover deleted files from your Mac.
User Guide : How to Retrieve Deleted Documents from Mac
Step 1Download and Install TunesBro DiskGeeker for Mac
The very first step is to download the program on the computer. You can download it directly from its official website. Go through the detailed instructions in installation wizard. Launch the program, once it is installed.
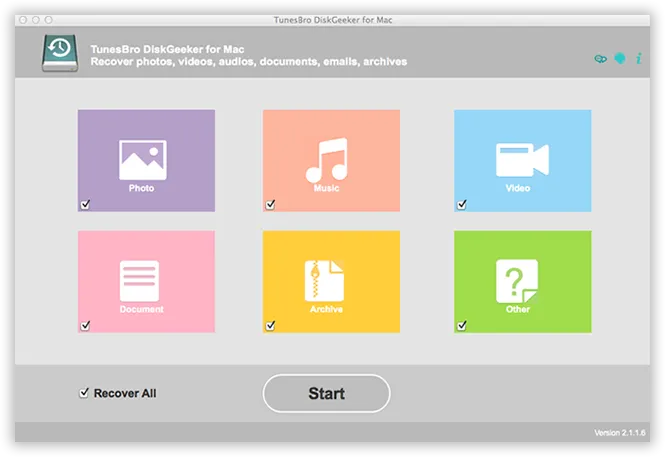
Step 2Choose Drive Name and File Type
Now, you have to choose the file type as per your needs, such as Music, Photo, Video, Archive, Document etc. that you want to recover. Or you can also "Recover All". The more you select, the more time it will take on scan process. Click "Start" and choose drive to scan. Click "Start Scan" button to start the scan process.
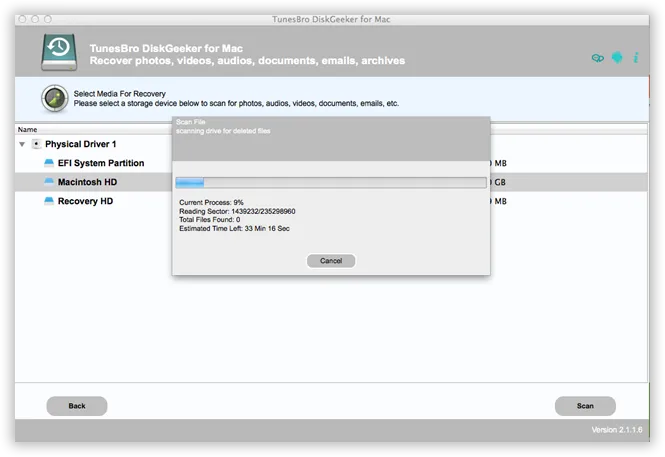
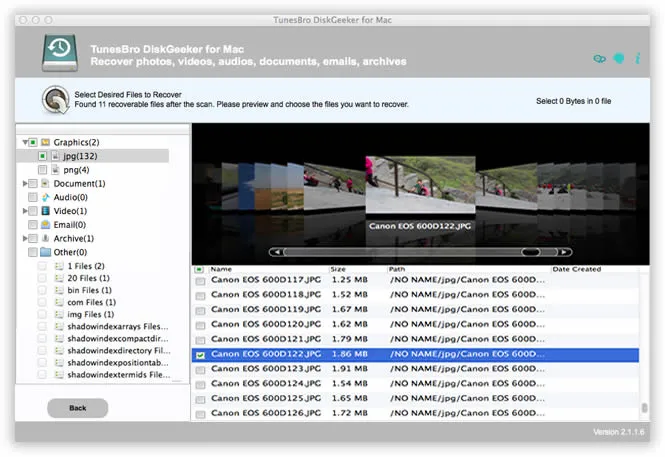
Step 3Preview & Recover Files
It may take a while to complete the scan process, which depends mostly on the number of files stored on the device. Once scanning is done, files are split in various categories. It can preview each file which is marked selected if you want to recover it. Once selected, click "Recover" to save the file on your system.
The first two methods is much easier and take less time. It tells us that backup is very important thing for Mac computers, especially you have a lot of important data on that computer. If not, there is still opportunities to recover the lost data by using third-party data recovery prorgams like TunesBro DiskGeeker. It can retrieve all kinds of files from deletion or formatting.
Related Articles & Tips
-

Recover Data from Dead or Broken Hard Drive

![[Solved] Recover Data from Mac](images/data_recovery/mac-recovery-2.webp)