Before we starting to resize image in Windows 10, it's necessary for us to learn about the Pixel. Have you ever heard of a term called Pixel? It is generally a very small square of a single color which can be seen quite clearly when you zoom in a picture. Now the more a picture contains the pixels in a certain portion of it, the clearer will be the photo. In a way, that is called the resolution. That is with greater number of pixels in a photo, a higher resolution picture is possible to attain. But mostly it has been noted, that high resolution (D) pictures, whether JPEG, PNG, GIF, etc take up a lot of your valuable space and thus becomes very essential to resize. Usually the pixels cannot be reduced or increased so easily, thus re-sizing photo size is the only laymen possibility to follow up.
Why you need to resize photos in Windows?
1) Suppose you are trying to upload a picture on a website but it has got a photo size limit.
2) The size of the image is above 25 MB and you are unable to send it via Gmail.
3) You wish to save some room in your computer as large sized photos have already taken a lot of space.
4) While you are sending photos to someone, it is taking much more time than expected due to large size.
Now the main concern is to know how to resize, rather reduce in most cases photos, and the Operating System that we would discuss in conjunction with this topic is Windows 10 here. So let's begin with the methods listed below to know how they work in real.
- Method #1: Resize Photos using Microsoft Paint in Windows 10
- Method #2: Resize Photos Using Internet Explorer and Snipping Tool
- Method #3: Resize Image using Microsoft Paint in Windows 10
Method #1: Resize Photos using Microsoft Paint in Windows 10
Very often we have negated the use of MS paint though it has been a very vital component since the beginning. And it's available in Windows 10 as well. But did you know that it can resize images apart from the usual painting criterion? If not then follow the steps given below:
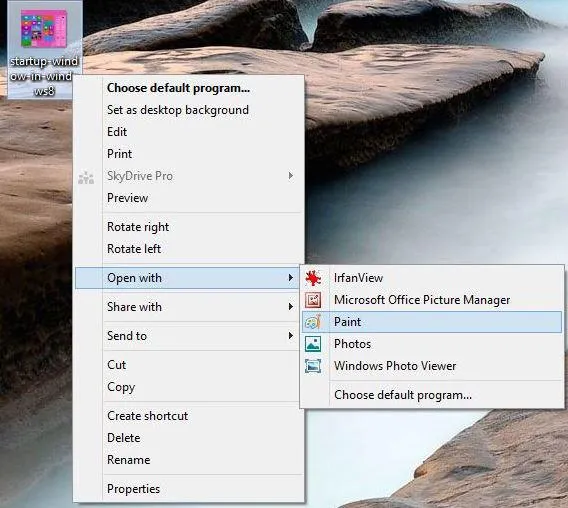
Step 1. First of all right click on the image that you want to resize and from the drop down menu, select "Open with" and then "Paint".
Step 2. When the image is opened up on the MS paint interface, click on the "Resize" button from the toolbar.
Step 3. In the new dialog box that appears, set all the parameters in accordance to your need like Percentage, Pixels, Skew, and don't forget to check the Maintain aspect ratio.
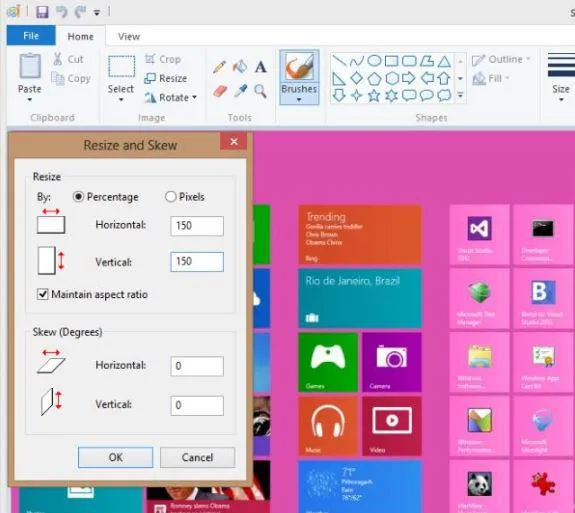
Step 4. Once you are done with your settings, click on "Ok" to carry on.
Step 5. Now you can save the image that you have resized with the original photo by clicking on "Save" option from the "File" option in the menu bar.
Dont's miss: 3 ways to recover deleted photos from Android phone
Method #2: Resize Photos Using Internet Explorer and Snipping Tool
Though this is a bit tricky method, but can be preferable in case of emergencies. Basically here we would open up the image using Internet Explorer and then would use the Snipping tool to cut the picture out after resizing it either zooming in or out. You can use Edge browser as well which is the default browser in Windows 10. How? Well, start reading the steps to get a better idea:
Step 1. Right click on the image that you prefer to resize and choose "Open with" and then select "Internet Explorer" option.
Step 2. Immediately the image will be opened up on the Internet Explorer platform.
Step 3. Next zoom in or out by either pressing "Ctrl + +" or "Ctrl + -"respectively.
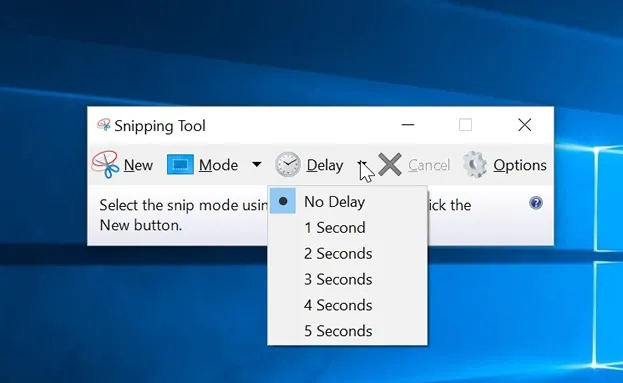
Step 4. Now here you have to run the "Snipping tool" which you can easily find by typing its name in the Cortana.
Step 5. Take a screenshot according to the size and portion you need and press "Ctrl + S" to save it to your computer for further use.
Method #3: Resize Photos using Microsoft Paint in Windows 10
There are certain websites which can do the job in no time without much hassle from your side. And that is what we are going to explore here. So this is what you have got to start with:
Step 1. Go to the following link: http://resizeimage.net/
Step 2. Click on "Upload an image" option to upload the image from your computer's directory.

Step 3. Next scroll a little down the webpage to locate the section "Resize your image" and adjust the settings there to resize it according to your need.
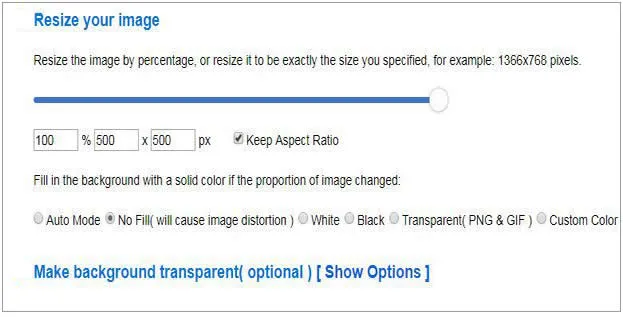
Step 4. Keep the "Keep aspect ratio" option checked if you don't want your image to be distorted.
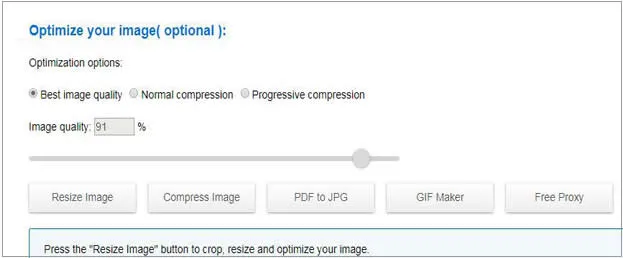
Step 5. After you have set the parameters right click on "Resize image" button at the bottom of the webpage and then "Download image" option to download the resized image to your computer.
While trying to expand the image instead of reducing its size make sure that pixels are not cracked or distorted in any way. Otherwise it will affect the resolution of the image and in the same manner while reducing its size, make sure that it does not become too small to come under notice. And when you are certain about these factors, use any of the three methods mentioned above to carry out your job.