Moving photos from an Android device to computer sounds like the simplest thing in the world. Unlike iOS, Android is a much more open environment, and it allows users to let the OS interact freely with external hardware and software. But while moving a bunch of images from a Samsung Android phone to a PC might sound like a simple process, a lot can go wrong if you don't use the right methods.
Some of the things that can go awry are that your computer won't be able to view device folders or make file transfers, the photo transfers might cause the system to hang, all the selected photos might not be moved, and so on. To avoid all of this, only use methods that have been tried and tested by millions of Samsung users on their PCs. At the very least, educate yourself on the best methods before you attempt anything.
We'll show you three very clean ways to transfer your photos from phone to computer. By clean, we mean that the process is simple, there's not much that can go wrong and your valuable photos will be safe throughout the process.
Supported Samsung Smartphone: Galaxy S9/S9+, Galaxy S8/S8+/Note 8, Galaxy S7 Edge/S7/S6 Edge/S6/S5/S4, Galaxy Note 8/7/5/4/3/2, Galaxy J7/J5/J3/J2, Galaxy A9/A8/A7/A5/A3/ and more.
Method 1 : Transfer Photos to PC or Mac as a Media Device via USB
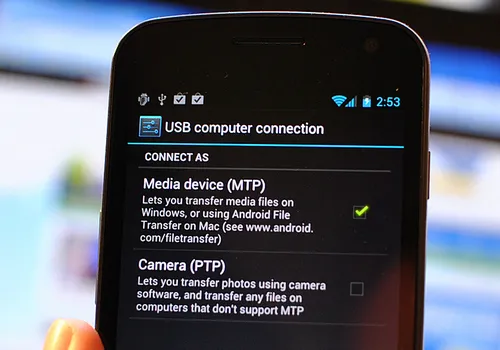
The easiest way to transfer photos from a Samsung smartphone to a computer is to plug it in using a USB cable. Once connected, swipe down from the top to access the notifications panel. There, you should see the option to connect the phone as a media device. On various Samsung models the prompt might be different, but you essentially want the device to be connected for media so the transfer can happen.
On your computer, open the file explorer and located your device. Drill down within that folder to locate the appropriate directory on the device itself or the microSD card if there is one. Now you can simply drag and drop images to a location on your PC. The method looks simple, but as we said before, things can go wrong even with such a simple process. In addition, the photos or images saved on other apps like Facebook, WhatsApp or Instagram can't be exported to computer with this method.
Method 2: Transfer Samsung Photos to Computer with Google Photos App
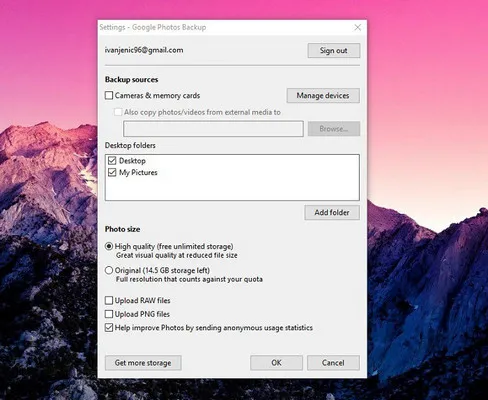
The second method is to use Google's cloud service for photos. Once archived, you'll be able to see and download the same images to your PC. This can all be done wirelessly, but it does involve using a lot of data. If you don't have unlimited mobile and broadband data, then this might not be the best method for you. But if you decide to go ahead, then you can follow these steps below:
The Google Photos app should be installed first on Samsung smartphone. Open it and sign in your Google account. There, you can turn on your backup and sync so everything on your phone gets backed up to the cloud. This is assuming that you've already set up a Google account on that phone.
On your PC, open the desktop version of Backup and Sync app and you should be able to see everything that was archived from your Samsung device. You can then download them to your PC. If you'd rather not save any data on the cloud, then try this third method
Method 3 : Transfer All Photos from Samsung to PC or Mac with TunesBro Android Manager
This transfer app works with any smartphone, not just Samsung. And it can be used to transfer images as well as more than a dozen different file types. It's as reliable as it is powerful, so if you've got a lot of images to transfer and you're worried about data usage or anything happening to your photos, then this is the app for you.
TunesBro Android Manager is one of the easiest things you can do. Here are the steps to follow to transfer all or just some of your photos to your PC.
Top Features of Android Manager
- Scan all photos and images on Samsung smartphone.
- Preview all photos in a single windows.
- Support other file types, including contacts, text messages, music, videos, etc.
- One-click backup and restore option.
- Support 2000+ Android smartphones and tablets.
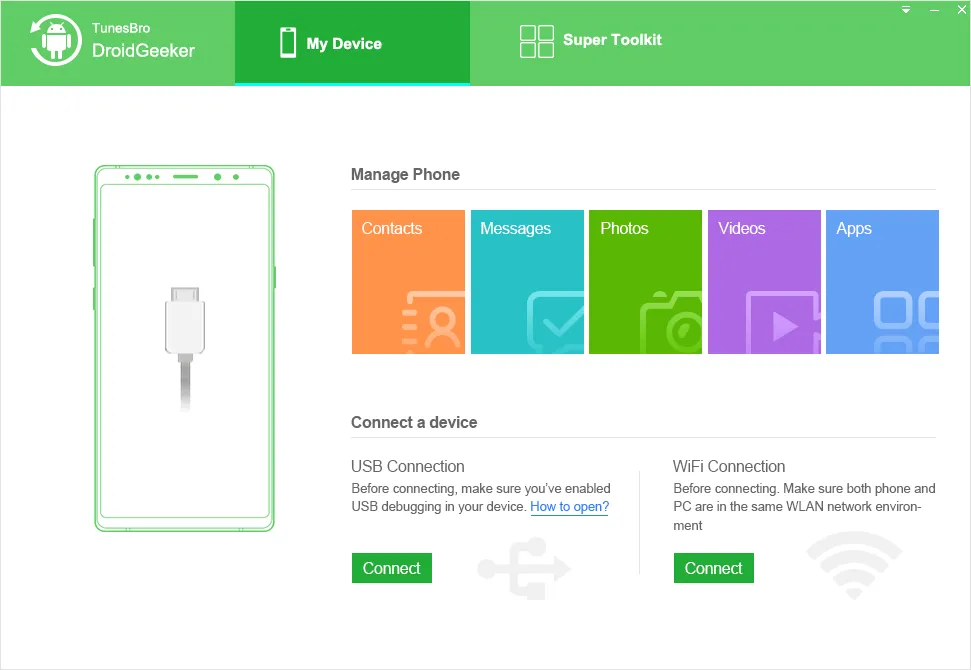
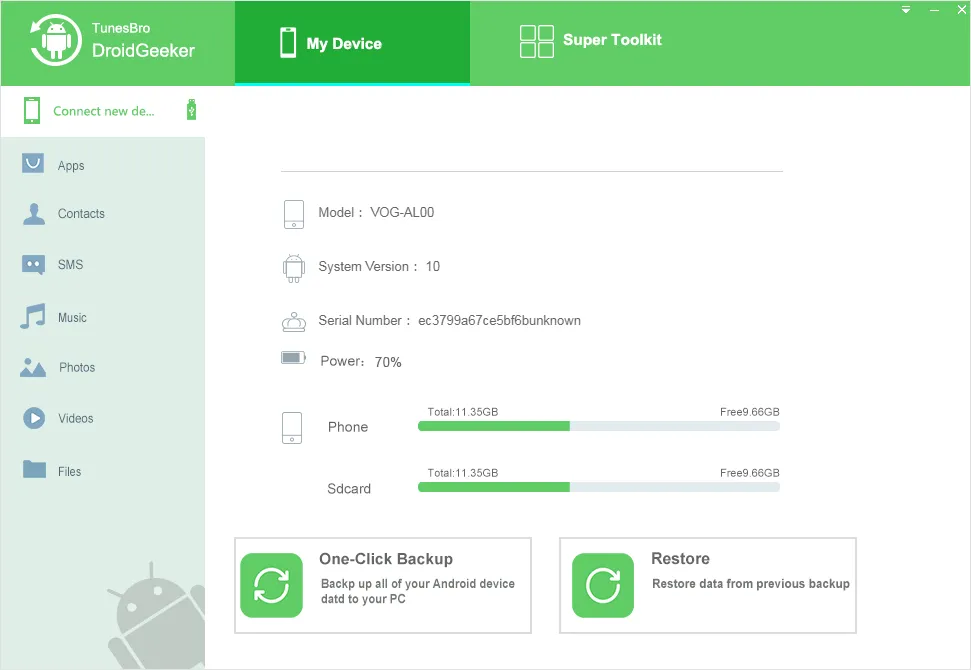
Step 1 Install Android Manager on a PC or Mac Computer
Download the application and install it on your PC, and connect your device, which will be automatically detected and displayed on the main window. Next to that, you'll see one option called "Connect", please click on that.
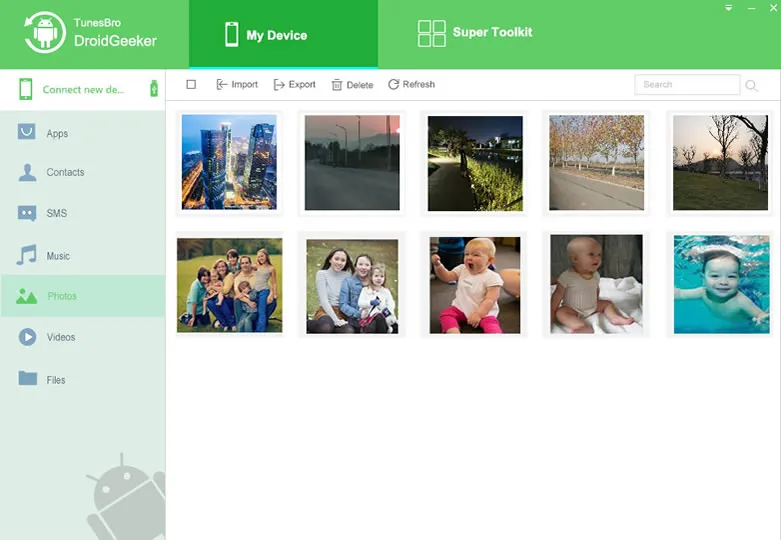
Step 2Choose Photos on Samsung Smartphone
In the next window, on the Photos tab, you'll see all your device images on the right and your image folders on the left. At this point you can add images to folders and manipulate them in any way you want.
Step 3Transfer Samsung Photos to PC or Mac
Once you've decided what to transfer, click on the Export icon and select Export. In the popup window, select a location on your desktop to save the photos to and click on "OK". In a few seconds you'll be done!
Final words : That's how simple it is when you use this software. It's intuitive and there's really not much work for you to do at all except for choosing what images you want to transfer. And the best part is that you use no mobile or broadband data, and all your images remain private instead of being uploaded to the cloud.