Whether you've been using a Google Pixel smartphone all this time and are considering switching to Samsung Galaxy S10, just acquired an additional Samsung phone or whatever reason, the biggest worry tends to be data transfer. In other words, how do I get my contacts, messages, photos and other content from Google Pixel to Samsung Galaxy? And how can I ensure that I don't miss anything or lose data during the transfer?
Unfortunately, many data transfer tools are not what they promise to be. The majority of tools for this can only handle one or a few types of data. On the plus side, these tools are great at what they do. The only downside is that very few applications can take care of the end-to-end data transfer for all data types on your mobile.
- Part 1: Transfer Contacts from Pixel to Samsung
- Part 2: Transfer Messages from Pixel to Samsung
- Part 3: Transfer Photos from Pixel to Samsung
- Part 4: Transfer All Data from Pixel to Samsung
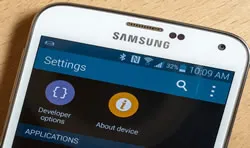
Part 1: How to Transfer Contacts from Google Pixel to Samsung Galaxy S10/S9/S8
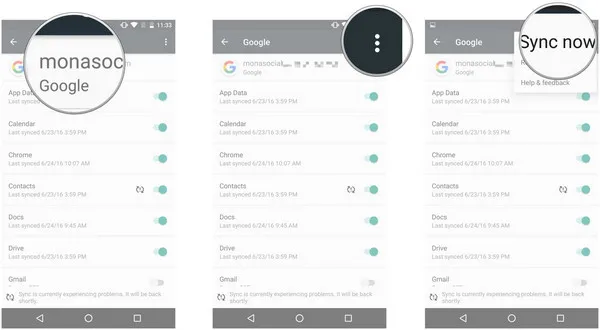
If you want to transfer personal contacts between Android devices, using Gmail is a great idea. Using Google account associated with email ID, you can sync contacts across multiple devices. The way to do this is to tweak the settings on Google Pixel to sync all contacts with your Google account, and then log into that same account from your Samsung device. The synced data will be available on the second smartphone.
Step 1: Go to Settings > Accounts > Google on your Pixel phone. Select Contacts from the list, along with any other data to be synced. Click on Sync Now.
Step 2: Samsung Galaxy phone should prompt you to set a Google account during setup. But even if you didn't do it then, you can do it now by going into your Accounts & Sync section and manually adding the associated Gmail account.
This is a good way to move contacts, but for messages, you will need a different approach.
Part 2: How to Transfer Text Messages from Google Pixel to Samsung Galaxy
You can also transfer text messages from Pixel to Samsung using your Gmail account, but there's an extra tool required. It's a mobile app called SMS Backup+. There are other tools, but this is pretty good for moving text messages from one Android phone to another. The app needs to be installed on both the Pixel and the Samsung device, and you will need to connect to the same Gmail account. Here's the detailed process:
Step 1: Install the app on your Pixel device and launch it.
Step 2: Connect the app to your Gmail account.
Step 3: Click on Backup to create an SMS backup, and use the Local Backup & Upload option to backup to your Gmail account.
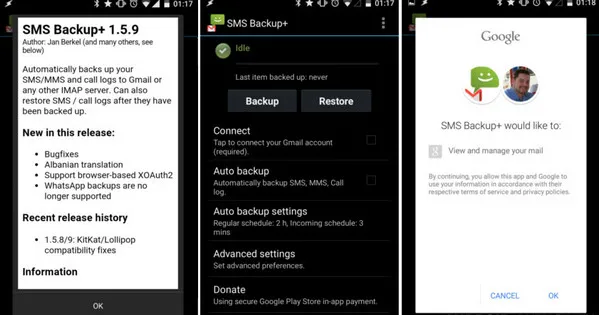
Step 4: Install the app on your Samsung device and connect to the same Gmail account. Download the backup file.
Step 5: In the app, you'll see a message to use SMS Backup+ as your default messaging app. You can click Yes, and then Restore. If you click No, you won't be able to restore messages. You can always change the default messaging app later on.
Part 3: How to Transfer Photos from Google Pixel to Samsung Galaxy
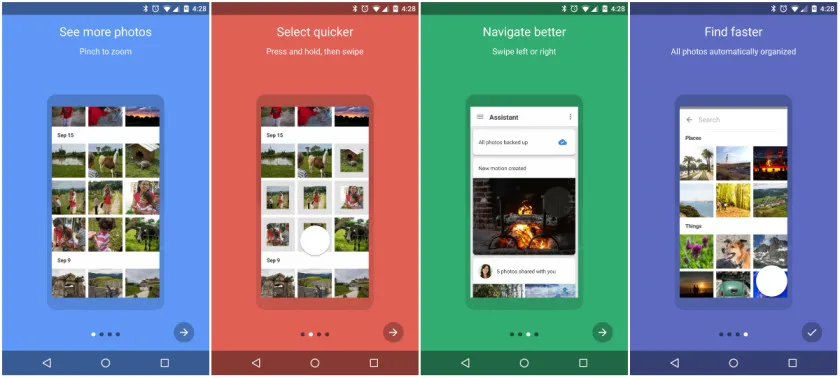
Google's Photos app is the front end of a powerful cloud storage solution with virtually unlimited capacity to store images and video clips. As such, it is also the easiest way to move photos from one device to another.
Step 1: Sign-in to your Google account on the Pixel device.
Step 2: The Photos app should be there by default, so tap on the icon to launch it.
Step 3: When prompted, choose the option to sync your device's images to Photos. Your photographs are now in the cloud.
Step 4: Open the Photos app on your Samsung device after signing into the same account. You should be able to see all your synced photos. You can download whatever you want to your local memory.
These methods are all great, but they have some very obvious disadvantages. First of all, they don't represent a unified solution even though many of the tools used belong to Google. Secondly, there's really no way to control what you transfer. However, if you have the right third-party software for this, you can easily move all or selected data from one device to another in mere minutes.
Part 4: Transfer All Data From Nexus 5X/6P/Pixel to iPhone X/8/7 in 1-Click
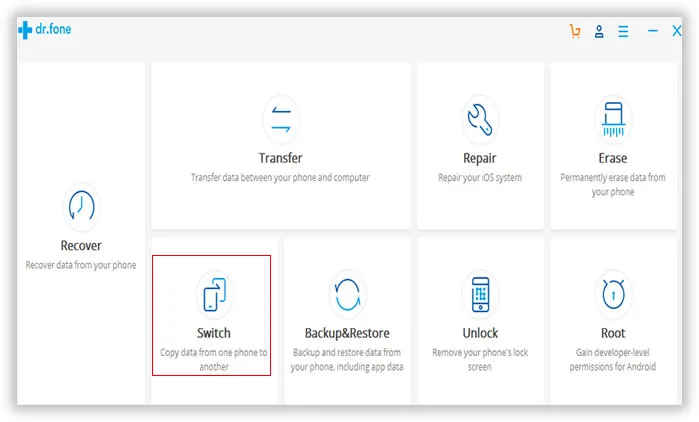
Phone Transfer is a part of a holistic Android Toolkit from Tunesro. The team has been lauded for several of their Android and iOS desktop utilities, and Phone Transferis one of the easiest tools to use for transferring all data types from one device to another, even iOS to Android and vice versa.
Another major advantage of using this tool is that you can choose what to transfer and what to leave behind. If you only want contacts, messages and photos, you can just choose those options. You can also pick from numerous other data types, or simply transfer everything. This flexibility makes it convenient as well as robust.
Support Devices: Samsung Galaxy S10+/S10/S10e/S9/S8/S7, Galaxy Note 9/8/7 and Google Pixel 3/2/1
Step 1Install Phone Transfer
Download the application on a Windows PC or Mac. Then follow the prompt to install the program on the computer. In this section, we will take Galaxy S10 for example.
Step 2Turn on USB Debugging on Google Pixel and Samsung Galaxy S10
Ubs debugging must be enabled before proceeding to the next step. If you don't know how to do this, here is the guide. Now, connect the Pixel and the Samsung devices to the computer using the original data cables that came with the phones.
Step 3Transfer Contacts from iPhone to Samsung Galaxy Phone
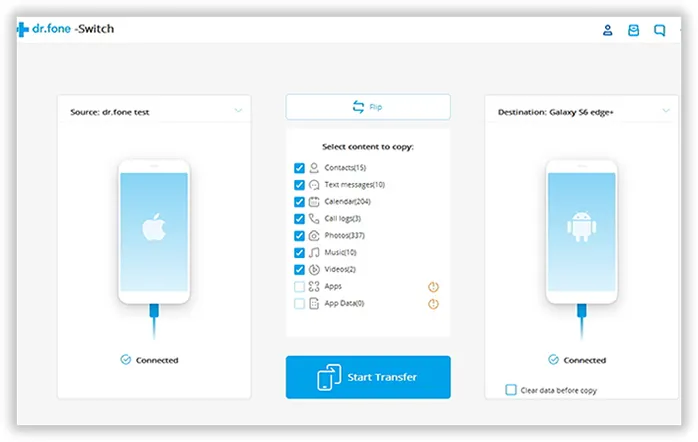
In the software interface, you'll be able to see your Pixel on the left and your Samsung on the right. If it's reversed, just click on the Flip button. The left is the source phone and the right is the target phone.
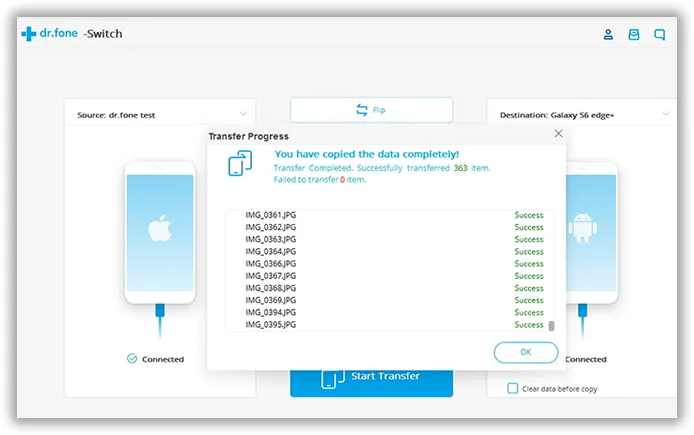
In the middle section, you'll see all the various data types that are available to transfer. Choose what you want to transfer. Hit Start Transfer to Copy all the selected data from Google Pixel to Samsung.
Closing Words:
There's really no easier way to accomplish a full phone switch in a matter of minutes. The software is designed to be intuitive and easy to use, but there are some complex processes that happen in the background to ensure that you don't face data compatibility issues once the information has been received in the Samsung device. Once you're done with the software, just eject the devices the way you'd eject any external media, and exit the software application.